I meant to share this earlier and it got lost. I thought this would be an interesting question to discuss especially around New Year's when people make such grandiose claims and declare their hopes and wishes for the coming year: What are the consequences of dreaming "too big"?
This article takes a look at 6 modern ghost "towns" and it means towns in terms of projects. Man-made projects that have ended up... empty.
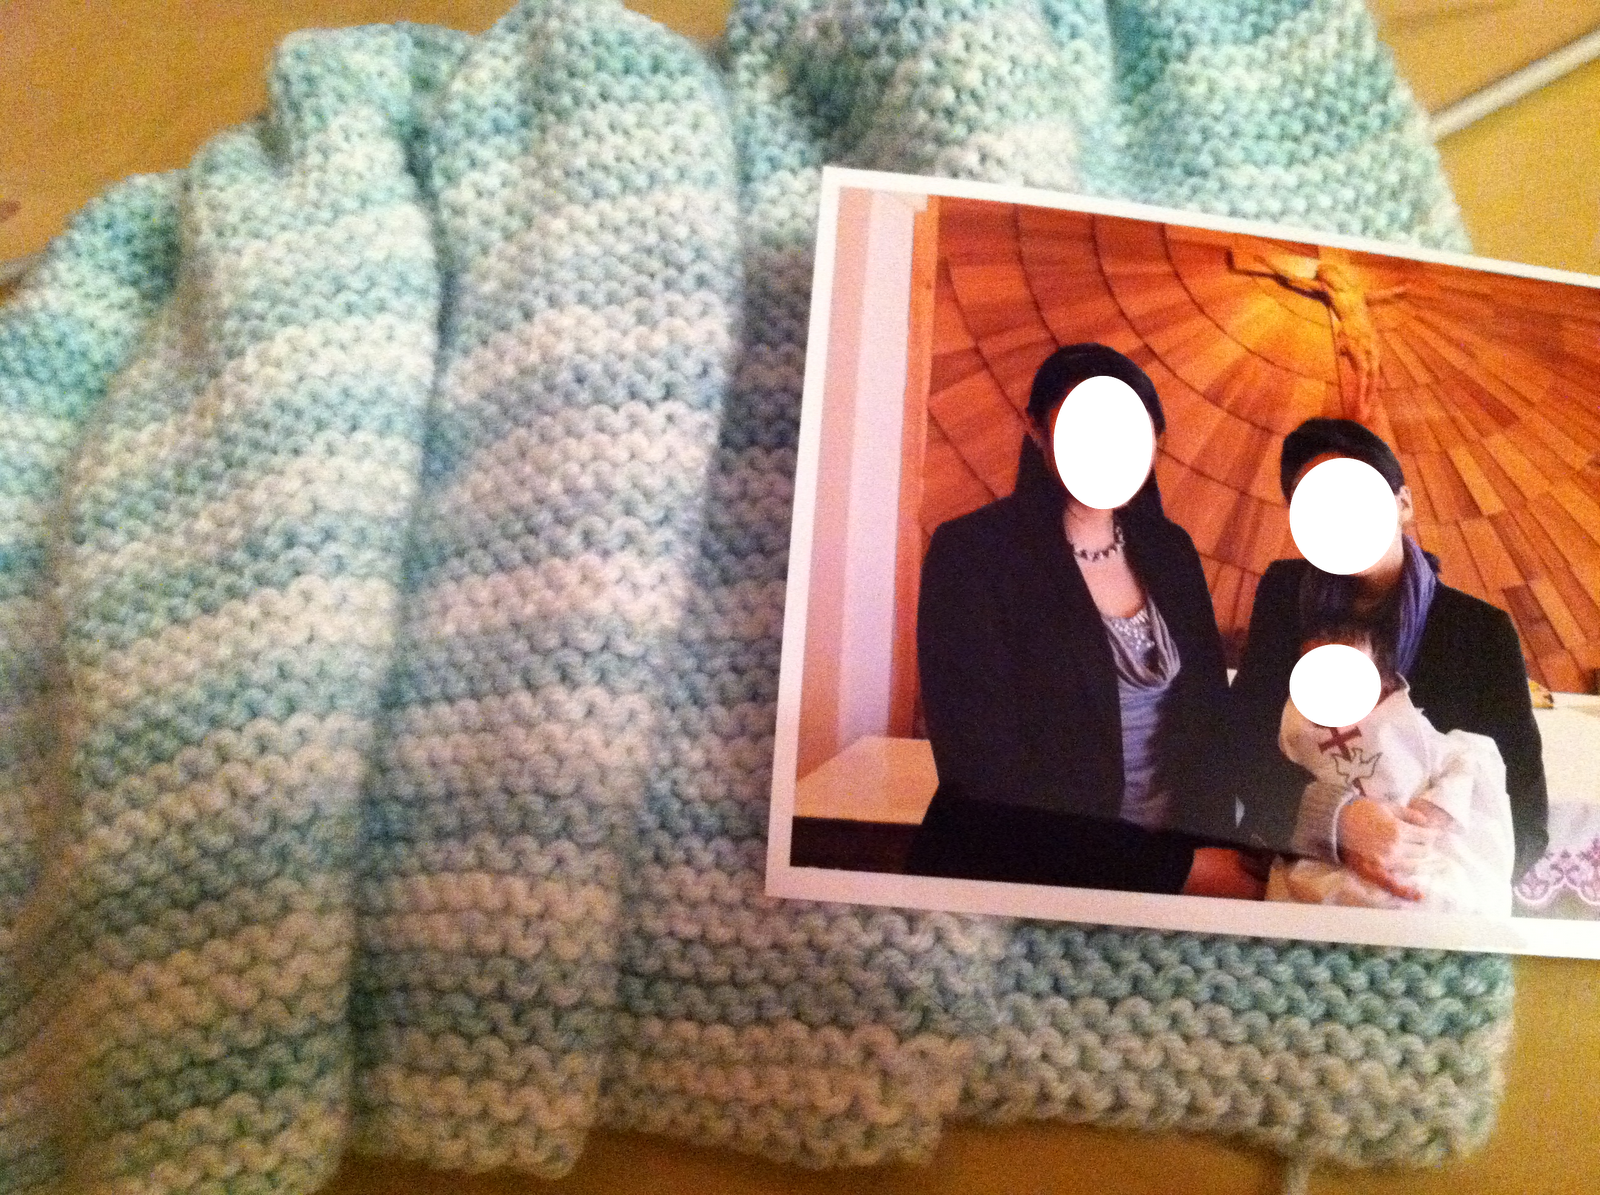
I have a bag of new yarn and a halfway to halfway finished blanket. This summer I picked up knitting, thought I was going to do it forever and started to knit one of my goddaughters a blanket. Here I am 6 months later, past Christmas and her birthday and the blanket is still sitting in my "knitting bag."
My sister has a 5000 piece jigsaw puzzle she bought and started before Christmas. My mom has 2 empty except for 2 pages scrapbooks she started making when I went off to college. We are all sometimes a bit more ambitious than might be productive. It's not necessarily a bad thing but where exactly do we draw the line to balance resources and investment?
So that leads to my question: What's your "ghost"?
Showing posts with label DIY. Show all posts
Friday, January 27, 2012
Friday, December 30, 2011
DIY Edible Gifts in Jars.
I forget where I first saw this idea first, but this winter, being low on funds and also creatively energized by all the baking I've been doing, I decided to make and give DIY food gifts.
This site was really helpful for inspiration. I ended up using recipes from this site but made my own tags with a few tweaks to the recipes.
Behold:
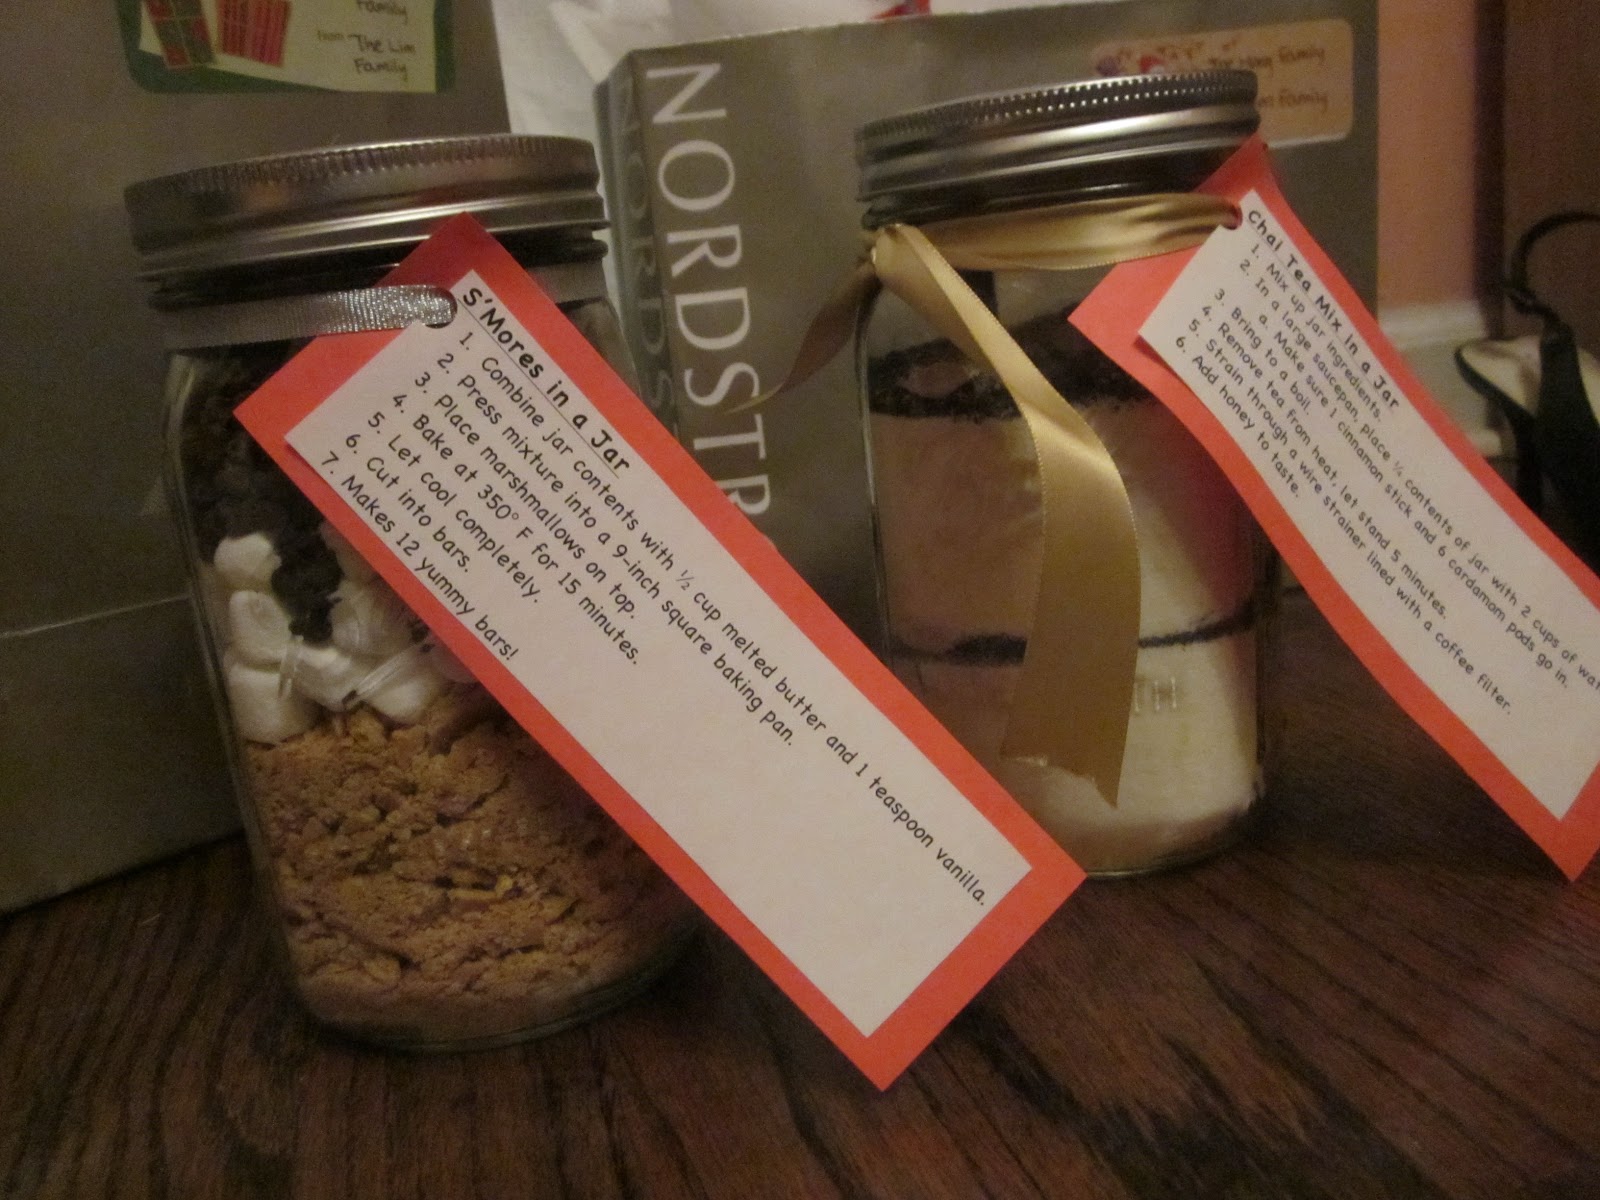
Set 1: Baked s'mores on the left and chai tea on the right (doubled the chai tea recipe).
Unfortunately, I was a bad elf and missed my delivery day because I got wrapped up in organizing the laundry room hehe. Will be giving them out this weekend =)
This site was really helpful for inspiration. I ended up using recipes from this site but made my own tags with a few tweaks to the recipes.
Behold:
Set 1: Baked s'mores on the left and chai tea on the right (doubled the chai tea recipe).
Set 2: Sugar cookies, Baked s'mores, and Chocolate chip muffins. Added Ninjabread cookie cutters for their two boys, a ballerina cookie cutter for my goddaughter, and adorable printed muffin tins.
Finished product!
Unfortunately, I was a bad elf and missed my delivery day because I got wrapped up in organizing the laundry room hehe. Will be giving them out this weekend =)
Wednesday, December 28, 2011
Organization Vacation: Laundry Room.
Continued from this post.
I must admit I was inspired by Kristen over at The Frugal Girl. She somewhat recently cleaned up/out her laundry room.
I kept ignoring my laundry room thinking: this isn't my house so it's not my problem (temporarily camped out at my parents). But I don't think that's fair PLUS it's really been bothering me.
Here are some before photos:
So yesterday, on my one day off for the holiday season, I decided to tackle the laundry room. And I MUST say I feel SO SO good.
For starters I moved clothes that weren't really drying (winter coats) and put them where they belong in the foyer closet.
The biggest challenge for most people in cleaning projects is that it gets a LOT worse before it gets better. You have to take everything out and it looks messier than it originally was - but once you sort through all that it gets better!
I always start with dividing into 3 categories: 1. Garbage, 2. Belongs here, 3. Belongs somewhere else. This makes it easy to figure out what has to go back into the space. Garbage is the easiest to take care of usually (unless you have a horde of batteries and weird electronics and biochemical waste). Then the "belongs somewhere else stuff" - just take it out of the space you're organizing. Even if you have to temporarily move it back - it's super helpful to see the space with JUST the stuff that HAS to go there so you can figure out what to put where. Anyway, I didn't have to buy anything new - enough garbage/stuff for other rooms came out of the storage containers in the laundry room that all I had to do was re-purpose. So instead of holding a bunch of garbage and random stuff, each container now has a purpose: plastic bin of scarves, plastic bin with sports stuff, bucket of Daddy's hats, all the plastic bags are in the tall metal garbage can, etc.
I must admit I was inspired by Kristen over at The Frugal Girl. She somewhat recently cleaned up/out her laundry room.
I kept ignoring my laundry room thinking: this isn't my house so it's not my problem (temporarily camped out at my parents). But I don't think that's fair PLUS it's really been bothering me.
Here are some before photos:
| View from the doorway - seriously disorganized shelves (and a whole lot of random stuff including garbage underneath). |
| Corner of randomness that is impossible to get to. |
![]() |
| Floor is covered by drying rack with dry pants from 3 weeks ago and bags of clothes we mean to donate. |
So yesterday, on my one day off for the holiday season, I decided to tackle the laundry room. And I MUST say I feel SO SO good.
For starters I moved clothes that weren't really drying (winter coats) and put them where they belong in the foyer closet.
![]() |
| Shelves next to doorway - I grouped by category and found acceptable storage containers for winter accessories and sports paraphernalia. |
| Consolidated cleaning supplies and excess paper products into the previously useless corner. AND I made a bucket of gift wrapping materials! |
| Bagged the "to-donate" bins and put them in the trunk to drop off. |
I always start with dividing into 3 categories: 1. Garbage, 2. Belongs here, 3. Belongs somewhere else. This makes it easy to figure out what has to go back into the space. Garbage is the easiest to take care of usually (unless you have a horde of batteries and weird electronics and biochemical waste). Then the "belongs somewhere else stuff" - just take it out of the space you're organizing. Even if you have to temporarily move it back - it's super helpful to see the space with JUST the stuff that HAS to go there so you can figure out what to put where. Anyway, I didn't have to buy anything new - enough garbage/stuff for other rooms came out of the storage containers in the laundry room that all I had to do was re-purpose. So instead of holding a bunch of garbage and random stuff, each container now has a purpose: plastic bin of scarves, plastic bin with sports stuff, bucket of Daddy's hats, all the plastic bags are in the tall metal garbage can, etc.
Friday, December 9, 2011
Food on Friday 8. Birthday Cake.
So, late again - but here's today's Food post.
Being a recent graduate school grad and working at a government fellowship left me (more than) a little low on funds this year, so I offered to bake my sister a cake, ANY cake, she desired for her birthday. This was a simple enough request and I received a simple enough answer: funfetti cake.
For those of you who are unfamiliar with funfetti cake, a picture below:
So, being an aspiring gourmand, I looked up homemade versions of a white cake and even looked up how to make homemade sprinkles from scratch! But no, she didn't want ANY of that. She just really wanted funfetti cake with NO icing. I mean, I'm not a fan of icing either but a cake with no icing just looks ugly and naked. I wanted to make her a BEAUTIFUL FABULOUS BIRTHDAY CAKE.
Finally, I convinced my sister to let me make a frosting for people who don't like frosting (of which I am one). And she caved. The process, below.
The recipe for the cake is from the box. I found the frosting recipe at Our Best Bites, and OHMYGOODNESS they are my new favorite website in the WHOLE. WIDE. WORLD. Seriously, I've bookmarked every recipe they post, sweet, savory, meat, dessert, ALL. OF. IT. I've made a few of their recipes since discovering their site (you can see my links from previous Food on Friday posts). Also, I love that there's such a devoted following of readers who try the recipes and add suggestions and comments. I've read through their hundreds of comments to tweak a few of the recipes.
Now, onto the CAKE.
Clockwise from top left: an upside-down cake cooling, mint green frosting, and bottom layer already frosted with star sprinkles.
The upside-down cake is the 2nd layer and about to go onto the frosting in the middle "gluing" the 2 layers together, I wanted to make the bottom was completely cool and wouldn't melt the in-between frosting. And although the frosting recipe warns against adding too much liquid element, I found that it dealt with the liquid food coloring just fine.
I could definitely learn to frost a cake smoother.
Definitely could've made MORE frosting and put MORE in between the 2 layers. Also, could've used 2 boxes of cake mix and made a bigger/higher cake. Also, perhaps I ought to invest in a cake slicer/leveler. It'll depend on how many more cakes I foresee baking. I have to admit, I really like cupcakes as an alternative as "mini-cakes." You'll see some mini-pies coming up soon!
P.S. If you have not heard me rant about this frosting in person, just know that I have been baking things JUST to serve as frosting receptacles, aka a vehicle to get the frosting into my mouth. It's THAT good.
Being a recent graduate school grad and working at a government fellowship left me (more than) a little low on funds this year, so I offered to bake my sister a cake, ANY cake, she desired for her birthday. This was a simple enough request and I received a simple enough answer: funfetti cake.
For those of you who are unfamiliar with funfetti cake, a picture below:
![]() |
| Funfetti Cake |
So, being an aspiring gourmand, I looked up homemade versions of a white cake and even looked up how to make homemade sprinkles from scratch! But no, she didn't want ANY of that. She just really wanted funfetti cake with NO icing. I mean, I'm not a fan of icing either but a cake with no icing just looks ugly and naked. I wanted to make her a BEAUTIFUL FABULOUS BIRTHDAY CAKE.
Finally, I convinced my sister to let me make a frosting for people who don't like frosting (of which I am one). And she caved. The process, below.
The recipe for the cake is from the box. I found the frosting recipe at Our Best Bites, and OHMYGOODNESS they are my new favorite website in the WHOLE. WIDE. WORLD. Seriously, I've bookmarked every recipe they post, sweet, savory, meat, dessert, ALL. OF. IT. I've made a few of their recipes since discovering their site (you can see my links from previous Food on Friday posts). Also, I love that there's such a devoted following of readers who try the recipes and add suggestions and comments. I've read through their hundreds of comments to tweak a few of the recipes.
Now, onto the CAKE.
| Prior to assembly |
The upside-down cake is the 2nd layer and about to go onto the frosting in the middle "gluing" the 2 layers together, I wanted to make the bottom was completely cool and wouldn't melt the in-between frosting. And although the frosting recipe warns against adding too much liquid element, I found that it dealt with the liquid food coloring just fine.
| Frosted and encircled with star sprinkles |
| Final product! |
![]() |
| Cross-section of a slice |
P.S. If you have not heard me rant about this frosting in person, just know that I have been baking things JUST to serve as frosting receptacles, aka a vehicle to get the frosting into my mouth. It's THAT good.
Friday, December 2, 2011
Food on Friday 7. Halloween Candy Corn Cookies!!
So I previously blogged about what to bake for Halloween.
I made these adorable Candy Corn Sugar Cookies.
I used the same sugar cookie recipe from this post about jam thumbprint cookies but tripled it.
Followed the food coloring directions - it was weird and marbled at first but the more I handled the dough, the color evened out and the dough came together (remember how I said it was so crumbly last time?)
I actually think pictures are really helpful for this recipe.
Then you line a bread pan (I used a narrow shoe box) lined with cellophane. Just go in the right order and try to get your layers as flat as possible.
Then, refrigerate/chill for QUITE SOME TIME so they'll be easier to cut/handle (it feels SUPER-long b/c you get so excited about making/eating the cookies!)
Use the overhanging cellophane to lift the tri-colored block out of the box, then cut 1/2 inch slices. I followed some reviewer suggestions and coated my knife in powdered sugar (instead of flour) so you don't make it too doughy/taste too flour-y. You can see a flat slice in the top-right of the picture below.
Then cut the slice into triangles!
On their way into the oven! So, when you cut the flat rectangular slice on diagonals to make triangles, inevitably half of the candy corns will come out with the colors reversed!
They get a little rounded as they bake so I found the sharper you cut them, the better. Also, you can really see what I mean about my wonky oven. The back of it has much stronger heat than the front (perhaps it's drafty?). So I've taken to rotating the pan halfway through the suggested baketime (for whatever it is that I'm making). And that helps with no noticeable increase in baking time.
A sample of two cookies (you can see what I mean by upside-down colors). I saved these from my co-workers (I brought in 50 at least! and they were gone in an hour!).
Oh, and I added just a touch of cinnamon (1/4 tsp) to make it taste more fall/autumn-y!
I made these adorable Candy Corn Sugar Cookies.
I used the same sugar cookie recipe from this post about jam thumbprint cookies but tripled it.
Followed the food coloring directions - it was weird and marbled at first but the more I handled the dough, the color evened out and the dough came together (remember how I said it was so crumbly last time?)
I actually think pictures are really helpful for this recipe.
Then you line a bread pan (I used a narrow shoe box) lined with cellophane. Just go in the right order and try to get your layers as flat as possible.
| Cross-section |
Use the overhanging cellophane to lift the tri-colored block out of the box, then cut 1/2 inch slices. I followed some reviewer suggestions and coated my knife in powdered sugar (instead of flour) so you don't make it too doughy/taste too flour-y. You can see a flat slice in the top-right of the picture below.
Then cut the slice into triangles!
On their way into the oven! So, when you cut the flat rectangular slice on diagonals to make triangles, inevitably half of the candy corns will come out with the colors reversed!
They get a little rounded as they bake so I found the sharper you cut them, the better. Also, you can really see what I mean about my wonky oven. The back of it has much stronger heat than the front (perhaps it's drafty?). So I've taken to rotating the pan halfway through the suggested baketime (for whatever it is that I'm making). And that helps with no noticeable increase in baking time.
A sample of two cookies (you can see what I mean by upside-down colors). I saved these from my co-workers (I brought in 50 at least! and they were gone in an hour!).
Oh, and I added just a touch of cinnamon (1/4 tsp) to make it taste more fall/autumn-y!
Friday, November 25, 2011
Food on Friday 6. Buttermilk Pancakes.
I'm not sure how this happened - but I was with Girlfriend 1
when I decided to call up Girlfriend 2 and told her we were coming over. Not only were we coming over but we
expected breakfast, please, feed us!
For some reason (probably, my friends are
super-super-awesome), Girlfriend 2 actually complied despite her ridiculous
hangover.
We went over and were greeted with beautiful fluffy
buttermilk pancakes.
Naturally I asked for the recipe. I believe it's this recipe from Allrecipes.com but I make a
few tweaks.
I only use 1 tablespoon of vinegar and add enough milk to
fill 1 cup of liquid (milk). I
also don't whisk out all the lumps - I barely combine the wet and dry
ingredients. The lumps are ok and
work themselves out on the frying pan as they cook. If you combine too much - you risk making your finished
product too tough and chewy rather than light and fluffy. I also cook over very low heat on
nonstick-coated pan w/no cooking oil.
I made these a few weeks ago for a weekend brunch and they were uber-delicious and oh-so-fluffy!
And you can add whatever you want to mix it up!
Here's an example of when I wanted to use up some pineapple
and blueberries we had. I just
drop in the fruit on top of the 1/4 cupful of batter in the frying pan.
Friday, November 18, 2011
Food on Friday 5: Pasta Carbonara. (A Quest!).
So, there was a boy who was terrified of my cooking and the only American food he claimed to like was pasta carbonara. Naturally, I had to learn to make the BEST! PASTA! CARBONARA! EVARRR!!!
This was quite an experiment - because I had to learn to make it on my own first, before I could dish it up and "WOW!" the boy.
Naturally, my first instinct was to check it out on Wikipedia to see the "roots" of the dish.
And as per my usual recipe "method," I then looked up all the carbonara recipes on Food Network and AllRecipes.com to check ratios and common ingredients.
Here are some of my attempts. This was probably my first attempt - SPAM was the only pork-meat I had and I grated my parmigiano-reggiano using a KNIFE and scraping the block of cheese against the side of a bowl.
A little watery and not "mixed/melted" enough.

A little watery still and still not quite enough CHEESE.
I think I made this one for a visiting friend with lunch meat and edamame and still pretty watery.
Back to SPAM but adding broccoli - doesn't the green really dress it up?
This is also when I started getting my working ratios down.
The recipe:
Serves 2
- Cook 2 servings of your choice of pasta according to directions on box (it's traditionally done with long noodles but I like shapes and ridges b/c I find it "holds" the sauce better) - here it's 1 1/2 cups of medium shells
- While pasta is cooking, whisk 1 egg, then stir in 1 cup grated parmigiano reggiano and a few pinches of truffle salt.
- I cut up 1/2 a broccoli head here and browned it with a single-serving SPAM slice
- Drain the pasta, leaving maybe a 1/4 cup or less of pasta water.
- Add HOT pasta into egg/cheese mixture and stir vigorously! (the heat from the pasta melds/cooks/melts the egg and cheese into a sauce)
- Mix in meat/veggie and keep stirring.
- Add 7 cracks of black pepper (or to taste) and split into 2 servings!
- VOILA!
With fish roe (I just love the bright colors!)
Used marinated chicken instead of pork - tasted great but not as pretty
The Process:
Cheese and egg mixture

Thick-cut bacon (closer to the traditional guanciale) and tomato bits
Hot pasta (gemelli) and egg/cheese being stirred together
Add the meat/veggies
And enjoy!
So as you can see, I think the traditional recipe is great as a base to work off of. I try to use whatever pork-meat I have but chicken and shrimp have worked just as well. I also try to mix in a(ny) veggie in b/c I feel a little indulgent eating just cheese and meat and pasta.
As it turns out, I never ended up making it for the boy but have an impressive yet quick, easy, and versatile pasta dish!
Wednesday, November 16, 2011
How to love a child.
(And in complete contrast to last night's post about a totally classy, family- and values-oriented college athletic coach...)
In light of the recent Penn State scandal surrounding Jerry Sandusky, I wanted to share some advice via a cute but (I believe) practical image I had saved. (There are definitely more "journalistic"perspectives out there but this is one from a point of view that I appreciate - a blog that loves sports - but doesn't protect its own).
Apparently, in an interview with Bob Costas, "Sandusky was trying hard to paint himself as someone who “loves” young people, but “isn’t sexually attracted” to them while saying he didn’t realize showering with a ten-year-old was wrong." (Quoted from TAH)
For anyone else who's not sure how to "love children/young people,"
In light of the recent Penn State scandal surrounding Jerry Sandusky, I wanted to share some advice via a cute but (I believe) practical image I had saved. (There are definitely more "journalistic"perspectives out there but this is one from a point of view that I appreciate - a blog that loves sports - but doesn't protect its own).
Apparently, in an interview with Bob Costas, "Sandusky was trying hard to paint himself as someone who “loves” young people, but “isn’t sexually attracted” to them while saying he didn’t realize showering with a ten-year-old was wrong." (Quoted from TAH)
For anyone else who's not sure how to "love children/young people,"
Monday, November 7, 2011
Other uses: Neosporin.
Neosporin.
I've long had "sensitive earlobes."
What this really means is that I can't wear any earrings for very long. Or my ears get infected and itchy and painful.
I received a pair of earrings for my past birthday that I LURV but could usually only bear to wear them for half the day before my holes hurt so much I had to take them out. And then my ears would be infected for a few days so I wouldn't be able to wear any earrings at all.
So - I recently found a way to deal with this problem: Every morning before I put (any of my) earrings into my ears, I stick the post into a tube of Neosporin to help kill all the bacteria on them/in my holes/around my holes/that develop during the day and then put the Neosporin-covered post straight into my ear (don't wipe it off or anything).
I have a specific Neosporin that is only for earring lubrication so I don't worry about it infecting my cuts or whatever else I use Neosporin for. If you have just one Neosporin then I would suggest squeezing it out onto a cotton swab (aka Q-tip) first and then using the swab to put the goo on your earring posts.
I haven't tried it myself but I imagine that anti-bacterial hand gel might work in this capacity as well.
(P.S. I also put Neosporin on pimples that accidentally pop (too early) when I'm washing my face a little too hard or in the shower - it cuts the healing time down drastically and doesn't leave a huge angry red (or white) mark).
I've long had "sensitive earlobes."
What this really means is that I can't wear any earrings for very long. Or my ears get infected and itchy and painful.
I received a pair of earrings for my past birthday that I LURV but could usually only bear to wear them for half the day before my holes hurt so much I had to take them out. And then my ears would be infected for a few days so I wouldn't be able to wear any earrings at all.
So - I recently found a way to deal with this problem: Every morning before I put (any of my) earrings into my ears, I stick the post into a tube of Neosporin to help kill all the bacteria on them/in my holes/around my holes/that develop during the day and then put the Neosporin-covered post straight into my ear (don't wipe it off or anything).
I have a specific Neosporin that is only for earring lubrication so I don't worry about it infecting my cuts or whatever else I use Neosporin for. If you have just one Neosporin then I would suggest squeezing it out onto a cotton swab (aka Q-tip) first and then using the swab to put the goo on your earring posts.
I haven't tried it myself but I imagine that anti-bacterial hand gel might work in this capacity as well.
(P.S. I also put Neosporin on pimples that accidentally pop (too early) when I'm washing my face a little too hard or in the shower - it cuts the healing time down drastically and doesn't leave a huge angry red (or white) mark).
Monday, October 31, 2011
From our friends at PSEG/PSE&G.
Since losing our power on Saturday evening, I have pretty much been stalking the PSEG outage map and Twitter feed via my iPhone and now at work on the Internet.
In the past 5 minutes the outage map has gone down and so I started clicking on some of the other links.
Here's a helpful hint:
Emphasis added by ME. SHUFFLE AWAY - with BOTH FEET ON THE GROUND or HOP. I know it's probably sound advice and following it probably saves lives - but it's just hard to imagine and amusing to picture.
Because my first instinct in leaving a car that is on FIRE is to RUN. AS. FAST. AS. I. CAN.
In the past 5 minutes the outage map has gone down and so I started clicking on some of the other links.
Here's a helpful hint:
In the event that a wire comes down on a vehicle with passengers, our advice is to stay in the vehicle until professional help arrives to safely remove you from the vehicle. If you MUST get out of the vehicle because of fire or other life-threatening hazards, jump clear of the vehicle so that you do not touch any part of the car and the ground at the same time. Jump as far as possible away from the vehicle with both feet landing on the ground at the same time.
Once you clear the vehicle, shuffle away, with both feet on the ground, or hop away, with both feet landing on the ground at the same time. Do not run away from the vehicle as the electricity forms rings of different voltages. Running may cause your legs to "bridge" current from a higher ring to a lower voltage ring. This could result in a shock. Get a safe distance away.
Emphasis added by ME. SHUFFLE AWAY - with BOTH FEET ON THE GROUND or HOP. I know it's probably sound advice and following it probably saves lives - but it's just hard to imagine and amusing to picture.
Because my first instinct in leaving a car that is on FIRE is to RUN. AS. FAST. AS. I. CAN.
Tuesday, October 25, 2011
Newspaper workspace.
Picked up a free AM New York paper today. Will probably need a few more to cover my workspace. Prepping for my weekend craft idea. :). Look forward to a craftsy post next week!
Tuesday, April 26, 2011
New uses for other things.
One of the most creative/useful of these types of lists I've seen lately.
Found on Elle:
1. Old Buttons
Repurpose spare buttons by using them to keep pairs of earrings together: Most buttons have at least two holes in them, so simply place an earring in each opening to neatly store when not wearing. Photo: Jupiter Images
2. Eyebrow Brush
Stuck without a lint-remover? Use this handy makeup tool to remove unwanted fuzz from your shirt. Photo: Courtesy of Sephora
3. Dryer Sheets
No time for a shampoo? Rub a dryer sheet on your hair to tame flyaways and make your hair smell shower fresh. Photo: Courtesy of amazon.com
4. Unused Stockings
Create a chic shrug by taking a pair of tights or stockings and cutting off the feet (or use a pair of footless tights to save a step). Place arms where legs would normally go and—voila!—you’ve created a sleek spring alternative to a shawl or cardigan. Take it a step further by cutting slashes into the fabric, Ã la Monique Lhuillier’s ballerina-inspired fall 2009 collection. Photo: Imaxtree
5. Shimmer Eye Shadow
Between visits to your colorist touch up dark roots by spraying a light hairspray onto them and—depending on what hue your highlights are—brushing a shimmering gold or brown eye shadow over the top. Photo: Courtesy of Nordstrom
6. Toothpaste
Have yellow nails? Scrub them with toothpaste to remove stains and add shine. You can also add a few drops of lemon juice for extra whitening; it’s a natural bleaching agent. Photo: Courtesy of amazon.com
7. Eggs
Strengthen hair by creating an egg yolk-and-olive oil hair mask. The protein in the egg yolk will toughen up tresses, while the olive oil will act as a conditioning agent. Photo: Jupiter Images
8. Toilet Paper
Don’t want to splurge on oil blotting sheets? Take a thin toilet-paper square and use it to blot excess oil on your T-zone. Photo: Jupiter Images
9. Facial Toner
Did you make a mistake applying your self-tanner? An alcohol-infused astringent or toner can help fix splotches and streaks. Photo: Courtesy of Walgreens
10. Honey
If your skin is sensitive and blotchy, apply a couple tablespoons of honey to your face and leave on for five to 10 minutes. The honey will moisturize, soothe, and help kill blemish-causing bacteria. Photo: Jupiter Images
11. Cooking Spray
Rather than spray quick-dry oil on your nails, reach for a cooking spray instead. Just be sure it’s the original, unflavored version or you might get grossed out by garlic-scented cuticles. Photo: Courtesy of amazon.com
12. Nail Polish
Secure buttons by applying a thin layer of polish to the center to keep thread from coming loose. Coating the bottom of your shaving-cream can with lacquer can also prevent rust stains from forming on your squeaky-clean bathtub. Photo: Courtesy of amazon.com
13. Flat Iron
A hair straightener works great for ironing between buttons on your shirt, where a regular iron doesn’t fit. You can also use it for minor wrinkles on your blouse when you’re in a hurry. Photo: Courtesy of ghd
14. Body Lotion
To tame unwanted flyaways, rub a dime-size amount of hand or body lotion in your palms and brush lightly on problem spots. Photo: Courtesy of Molton Brown
15. Antacid Tablets
All out of toilet cleanser? Toss in two dissolving antacid tablets, wait 20 minutes, and brush. This will help to remove those nasty stains around the toilet bowl. Photo: Courtesy of Jupiter Images
16. Clear Tape
Remove dry skin from lips by pressing the sticky side of tape to your pucker, or see what a nail polish color will look like without the mess by placing a small piece on your nail and doing a quick test. Photo: Courtesy of Jupiter Images
17. Petroleum Jelly
Help avoid blisters from those stylish-yet-painful stilettos by coating problem spots with petroleum jelly before slipping shoes on. Also: Neaten a nail job by dabbing on skin around your cuticles pre-polish. This way, if you make a mistake, the polish is easily wiped away. Photo: Courtesy of amazon.com
18. Listerine Mouthwash
Have a painful blister that popped? To disinfect, dab a few drops of Listerine Mouthwash on—it’s a powerful antiseptic. Photo: Courtesy of amazon.com
19. Yogurt
If you burn your forehead using a curling iron, slather plain yogurt on the wound—the coolness will help with swelling and the yogurt will reduce redness and speed the healing process. Photo: Courtesy of Dannon
20. Paper Towels
Don’t have rollers on hand? Wrap hair in twisted paper towels; you can use more or less leaflets depending on how large or small you want the diameter of your curls to be. Photo: Courtesy of amazon.com
21. Vinegar
Considered a natural bleach and powerful cleanser, vinegar (just a dab) can reduce the blueness of bruise. This kitchen staple can also be used in your bubble bath to help prevent yeast infections. Tip: Try apple-cider vinegar for a less pungent smell. Photo: Jupiter Images
22. Rubber Band
Make room for an expanding waistline by hooking a rubber band through the buttonhole of your pants; secure the other side to the button, and wear a tunic top to cover up your handiwork. Photo: Jupiter Images
23. Hair Conditioner
When you’re low on shaving cream, hair conditioner can provide a smooth, slick barrier between your razor and sensitive skin. Photo: Courtesy of Pantene Pro-V
24. Cornstarch
Detangle a knot in seconds: Rub cornstarch into stubborn knots on shoelaces, string, chain necklaces for greater grip and control. Photo: Courtesy of amazon.com
25. Oatmeal
Whether you have dry, itchy winter skin or discomfort from summer mosquito bites, mixing cooking oats into your bath will provide instant relief. Photo: Courtesy of amazon.com
Found on Elle:
Repurpose spare buttons by using them to keep pairs of earrings together: Most buttons have at least two holes in them, so simply place an earring in each opening to neatly store when not wearing. Photo: Jupiter Images
Stuck without a lint-remover? Use this handy makeup tool to remove unwanted fuzz from your shirt. Photo: Courtesy of Sephora
No time for a shampoo? Rub a dryer sheet on your hair to tame flyaways and make your hair smell shower fresh. Photo: Courtesy of amazon.com
Create a chic shrug by taking a pair of tights or stockings and cutting off the feet (or use a pair of footless tights to save a step). Place arms where legs would normally go and—voila!—you’ve created a sleek spring alternative to a shawl or cardigan. Take it a step further by cutting slashes into the fabric, Ã la Monique Lhuillier’s ballerina-inspired fall 2009 collection. Photo: Imaxtree
Between visits to your colorist touch up dark roots by spraying a light hairspray onto them and—depending on what hue your highlights are—brushing a shimmering gold or brown eye shadow over the top. Photo: Courtesy of Nordstrom
Have yellow nails? Scrub them with toothpaste to remove stains and add shine. You can also add a few drops of lemon juice for extra whitening; it’s a natural bleaching agent. Photo: Courtesy of amazon.com
Strengthen hair by creating an egg yolk-and-olive oil hair mask. The protein in the egg yolk will toughen up tresses, while the olive oil will act as a conditioning agent. Photo: Jupiter Images
Don’t want to splurge on oil blotting sheets? Take a thin toilet-paper square and use it to blot excess oil on your T-zone. Photo: Jupiter Images
Did you make a mistake applying your self-tanner? An alcohol-infused astringent or toner can help fix splotches and streaks. Photo: Courtesy of Walgreens
If your skin is sensitive and blotchy, apply a couple tablespoons of honey to your face and leave on for five to 10 minutes. The honey will moisturize, soothe, and help kill blemish-causing bacteria. Photo: Jupiter Images
Rather than spray quick-dry oil on your nails, reach for a cooking spray instead. Just be sure it’s the original, unflavored version or you might get grossed out by garlic-scented cuticles. Photo: Courtesy of amazon.com
Secure buttons by applying a thin layer of polish to the center to keep thread from coming loose. Coating the bottom of your shaving-cream can with lacquer can also prevent rust stains from forming on your squeaky-clean bathtub. Photo: Courtesy of amazon.com
A hair straightener works great for ironing between buttons on your shirt, where a regular iron doesn’t fit. You can also use it for minor wrinkles on your blouse when you’re in a hurry. Photo: Courtesy of ghd
To tame unwanted flyaways, rub a dime-size amount of hand or body lotion in your palms and brush lightly on problem spots. Photo: Courtesy of Molton Brown
All out of toilet cleanser? Toss in two dissolving antacid tablets, wait 20 minutes, and brush. This will help to remove those nasty stains around the toilet bowl. Photo: Courtesy of Jupiter Images
Remove dry skin from lips by pressing the sticky side of tape to your pucker, or see what a nail polish color will look like without the mess by placing a small piece on your nail and doing a quick test. Photo: Courtesy of Jupiter Images
Help avoid blisters from those stylish-yet-painful stilettos by coating problem spots with petroleum jelly before slipping shoes on. Also: Neaten a nail job by dabbing on skin around your cuticles pre-polish. This way, if you make a mistake, the polish is easily wiped away. Photo: Courtesy of amazon.com
Have a painful blister that popped? To disinfect, dab a few drops of Listerine Mouthwash on—it’s a powerful antiseptic. Photo: Courtesy of amazon.com
If you burn your forehead using a curling iron, slather plain yogurt on the wound—the coolness will help with swelling and the yogurt will reduce redness and speed the healing process. Photo: Courtesy of Dannon
Don’t have rollers on hand? Wrap hair in twisted paper towels; you can use more or less leaflets depending on how large or small you want the diameter of your curls to be. Photo: Courtesy of amazon.com
Considered a natural bleach and powerful cleanser, vinegar (just a dab) can reduce the blueness of bruise. This kitchen staple can also be used in your bubble bath to help prevent yeast infections. Tip: Try apple-cider vinegar for a less pungent smell. Photo: Jupiter Images
Make room for an expanding waistline by hooking a rubber band through the buttonhole of your pants; secure the other side to the button, and wear a tunic top to cover up your handiwork. Photo: Jupiter Images
When you’re low on shaving cream, hair conditioner can provide a smooth, slick barrier between your razor and sensitive skin. Photo: Courtesy of Pantene Pro-V
Detangle a knot in seconds: Rub cornstarch into stubborn knots on shoelaces, string, chain necklaces for greater grip and control. Photo: Courtesy of amazon.com
Whether you have dry, itchy winter skin or discomfort from summer mosquito bites, mixing cooking oats into your bath will provide instant relief. Photo: Courtesy of amazon.com
Subscribe to:
Posts (Atom)